Growing Back To My Roots
Lessons from Grandmama's Kitchen Garden

Hey, Fellow Growers! Every year I have friends asking me what I do to get such sweet, plump tomatoes. So, I thought I’d share my thoughts and tips on my practices by giving you the top five things I do every growing season to ensure I have a great tomato harvest. I’m not going to get in-depth with this post, I’m going to work from the position that you have basic knowledge of growing vegetables. However, if you’re a newbie, check out my Handy Guide to Growing Tomatoes, which covers everything from starting seeds to growing and nurturing, pest control, and harvesting. Today, I want to just focus on the five little extras I do every year to ensure that I grow nice plump tomatoes that are rich in flavor.
1. Pick The Best Variety
Get the best tomato variety for your climate zone. This is one of the best things you can do to get plump flavorful tomatoes. I live in Seattle, WA, which is in USDA Hardiness Zone 8b. Before 2012 we had zone 7b since 1990, showing that Climate change is real. There are eleven zones, and basically, the higher the number, the hotter it gets. Tomatoes like warm soil, and we have a short growing season, which means I need a plant that is someone cold tolerant to have fruit growing into the early fall. It also means that I typically can’t get those plants in the ground until about the end of May, once the overnight temps have started to reach over 50 degrees Fahrenheit.
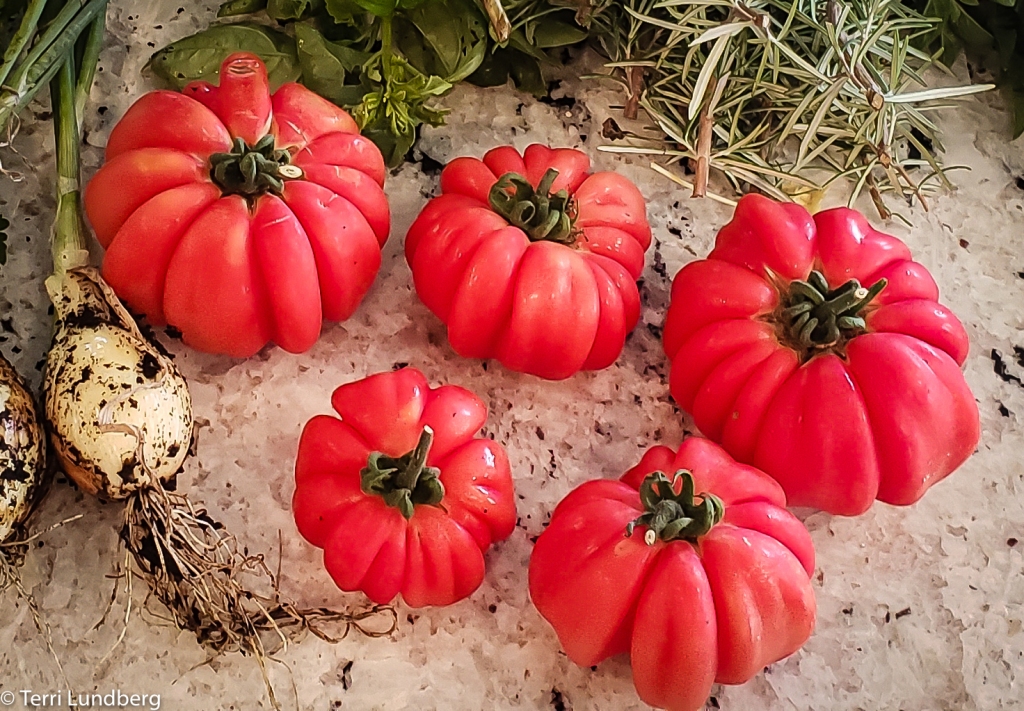
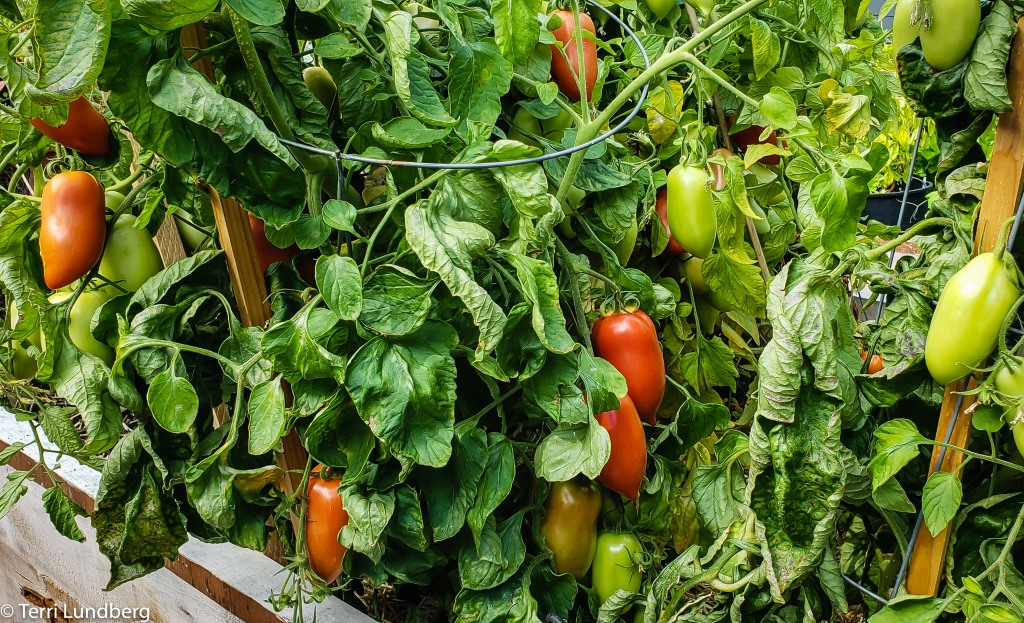
I don’t experiment a lot. I’ll pick up a new variety here and there, but I tend to stick with varieties that produce good fruit every year. Two of my favorite slicing varieties are Moskvich, and Mushroom Basket. Also, I grow San Marzano Roma Tomatoes along with Sweet Million Cherry Tomatoes These two grow to a size that is about ti size of the palm of my hand, the meat is deep red and flavorful. By doing this, I can ensure I have way too many tomatoes for just me and my husband, and therefore end up sharing with everyone.
2. Nurture and Nourish Those Roots

You have to start with a great foundation in which to plant that perfect variety. It won’t matter if you’ve picked the ideal tomato for your climate if you don’t give those roots a great foundation. There are a couple of things that I do to guarantee my plants have a strong root structure. I start with great soil. About a month before transplanting the seedlings or plant starts, I place a two-inch layer of compost on top of the soil. I use a local compost brand called Ceder Grove. The Seattle rains ensure that those nutrients reach down into the soil.
A few years back, I started adding Diluted Seawater (DSW) to the soil and as a foliar spray, and that year I had a bountiful harvest of best-tasting tomatoes I had ever tasted. The number of tomatoes seemed like double the amount from previous years. I’ve been doing it ever since. Apply the DSW by saturating the soil just before planting or the morning. You can do this the day before or the morning of. DSW is one part seawater, collected from the ocean, to 30-parts regular water. I use water from the tap that I‘ve let sit in a bucket to off-gas anywhere from 24 to 48 hours. You’ll have to make the determination of how much to make based on your grown space and what it takes to saturate that area. The College of Tropical Agriculture and Human Resources, Cooperative Extension Service, has an excellent research guide, Natural Gardening: Diluted Seawater, that gives you all the details. So, what does DSW do that so great? Seawater is choked full of essential plant macronutrients along with micronutrients that are essential for strong root development but are often depleted in soil. And, if that wasn’t enough, research shows that tomatoes watered with DSW developed higher levels of vitamin C, vitamin E, dihydrolipoic acid, and chlorogenic acid. Spray DSW on the plants during the flowering and fruiting stage every three weeks, with a light spray two weeks before harvest to increase the fruit sweetness.
The last step, yet just as important step to developing strong roots, is to plant the stem deep into the soil. When the transplant is ready, I remove the bottom leaves and place about 60 percent of the plant in the ground on top of a handful of all-purpose fertilizer. I love the Down to Earth Natural Fertilizers, and I also use Dr. Earth.
And, don’t forget to plant the stake at the time you plant the transplant as you don’t want to damage roots by doing it after the fact.
3. Give Them Steady Water
Once you’ve selected the perfect varieties for your area and introduced them to your soil that is rich with nutrients, you’re going to want to make sure you keep the soil consistently moist, yet you do not want to overwater. Overwatering will drain your tomatoes of flavor. I water deeply every other day in the mornings, on the days that we do not get rain. To keep the soil moist and to prevent from drying out, I lay straw around the plants, which keep the soil moist, but not wet, as the soil is well-drained. The straw mulch is added after you’ve planted the transplants, as you want to use the straw mulch to keep the soil warm as well as moist.
Once the plants start to fruit in august and the temps are rising, and the rain is slack, I deep water twice a day, once in the mornings around 7:00 a.m. and again around 5:00 p.m. We have long days in Seattle in the summer. The sun will not set until 9:30 some nights, and it can get very hot, and if it’s hot all day, this can cause the soil to get a little too dry for my liking, especially if temps reach consistently into the high 80s and 90s. Keeping the soil consistently moist, but well-drained prevents Blossom End Rot. That’s as nasty as it sounds, and there is nothing plump and juicy about that.
4. Pinch ‘em and Prune ’em
Pinch in pruning is an essential step in cultivating tomato plants. The process makes sure that the plant’s energy and nutrients are going where you want them to go, which will ensure plumb, nutrient-rich tomatoes. So what are you pinching and pruning? You’re going to want to focus on three areas: side shoots or suckers, the first flowers, and the top of the plant. Though the first one is called a sucker, everything you’re pruning is to prevent the sucking away of nutrients and energy. Side shoots or suckers are stems that start to grow in the crease between the main plant stem and a leaf branch. These are called suckers because this small thing will quickly grow into a full-grown second plant and will suck energy and nutrients from the main plant, and decrease your yield. This is important for me since my growing season is short, I want to get as many tomatoes as I can in that period.
Next are the first flowers. You’ll see flowers start soon after transplanting. Or, maybe you’ve purchased a tomato start that already has flowers on it. You’re going to want to pinch those off because at this early stage, you want the plant to put its energy into developing deep, strong roots, not in setting fruit. There will be plenty of time for that later on, and it’s proven that by pinching those early flowers, you actually yield more fruit due to the strong root structure.
Lastly, I prune the top of the plant once it reaches about six feet high. I only do this to the indeterminate varieties. If you don’t cut the tops, the plant will continue to grow up and up, and I’m only so tall. So, once the plant reaches just past the top of the 6-foot wooden stake that I inserted when planting the transplant, I cut the top of the main stem. Once the plant reaches this point, there will be fruit on the tree. By cutting at this point, it stops the plant from growing higher and bigger, which will keep the nutrients and energy right where you want it with the fruit that’s on the plant. It will also encourage the plant to start setting more flowers, which means more yummy tomatoes.
5) Give Them a Little Time & Attention
This may seem like a little detail, but it’s a very important one. It’s the number one thing that is indirectly related to ensuring all of your above efforts aren’t wasted. Every day I inspect my plants. Every. Single. Day. And, even with this, sometimes I’ll overlook something, which is why give them daily attention. You’re looking out for pests, changes to the leaves, anything that looks out of order and can cause damage to our tomatoes. Catching problems early is essential to reducing damage to fruits and possibly your entire crop. I’ve known people to lose their entire tomato crop to hookworms. All it takes is a couple of days for those critters to destroy a whole plant. Additionally, you’ll want to look at the underside of the growing fruit. If you detect blossom end rot early on, it will allow you can make the proper corrections.
I hope that you’ve found my tips useful. If you’re a gardening newbie, make sure to check out my Handy Guide to Growing Tomatoes. And, you’re a seasoned gardener, what do you do to ensure you have a bountiful harvest of tasty tomatoes?
Until next time, happy gardening!

Wow! I guess when they say good food is a product of love, I never really thought about it starting from the growing and harvesting process. The seawater idea is really interesting to me. I typically have thought of saline rich soil as a negative, but I guess it makes sense that a diluted amount could make for even tastier tomatoes. With so much time on my hands in quarantine, I have been thinking about gardening. As a Jersey girl, I also love a good summer tomato. Thanks for the tips and inspiration!
LikeLike
Thank you, Tara, for stopping by! Good food really does start from the growing process. There is a love and nurturing aspect to gardening that I don’t give much thought to, but I have a great appreciation for it.
~Terri
LikeLike
Hi Terri,
This is a very informative listicle post about growing the perfect tomatoes, but I missed the number of steps in your title. The pictures are an awesome touch to show progress. Awesome post.
LikeLike
Hi Terri! This is so helpful and had a lot of great information that I’ve never heard before. Will definitely be trying some of these tips out!
LikeLike
Thanks Val for stopping by! I’m happy to read you found my tips helpful.
~Terri
LikeLike
Interesting and tutorial. Now I know how to grow delicious tomatoes. Thank you.
LikeLike
Thanks Rolle for stopping by.
LikeLike